Divi by Elegant Themes is an incredible platform. I say platform because referring to as just a simple theme today just wouldn’t do it justice. Divi’s extensive documentation, expandability, and feature-rich dashboard truly make Divi a cut above the rest. We’ve talked a lot about the Theme Builder on this blog, so I promise this won’t be another post about that. Sorta :)
But The Theme Builder is incredible. You can use it to build entire sections of your Divi website with ease using the same page builder that you’ve been using for the interior parts of your site for years. The Theme Builder also is expandable using ACF which we covered in this blog post.
However, sometimes there are still situations where there just isn’t quite the right module for the job. What do you do then? In this blog post, I’ll cover how I handle those limitations by expanding Divi with either WordPress plugins, child themes, or custom modules.
Limitations Might Be The Wrong Word
But before I get into any of that, let me first say “limitations” might not be the right word here. Saying that Divi is limited because it doesn’t have a super niche feature that you need for a specific project isn’t fair to Divi.
In fact, Divi wouldn’t be the theme it is today if it came with all the bloat that would be required to fit every single niche.
Ways To Expand Divi
Divi is expandable and compatible with all the big players in WordPress. That alone is more than can be said for many of the competitors out there. And on top of all that, it continues to grow and expand with their brand new Divi Marketplace hosted by Elegant Themes.
A few ways to expand Divi include plugins or extensions, custom modules, and a custom child theme. I use each method depending on the situation.
Plugins & Extensions
A plugin is a bit of code that can be added to any WordPress site. An extension is a plugin that extends upon another plugin or theme and will only work if that other plugin or theme is installed.
An example of a useful plugin would be Gravity Forms. Gravity Forms is a plugin that gives you a better form builder then what comes out of the box with Divi. It also has many extensions available to improve upon its basic functionality even further. I talk about Gravity Forms in great detail in another post here. The TLDR is that it’s a great tool and you should absolutely check it out.
Custom Modules
A custom module would be something you purchased either from the Divi Marketplace (available in 2020) or other Elegant Themes marketplace vendor, that expands upon Divi specifically. These would technically be plugins that you install, but all they would do is create a new module that you can use with the Page Builder.
I expect that soon, many popular plugins will start adding Divi Module codes into their plugins, or start selling these extensions on the Divi Marketplace.
Child Themes
And finally, my favorite solution is to create a child theme. I go over that in detail in a previous post. I even give a downloadable child theme zip file away in that. Check that post out here!
With a child theme, you can create custom shortcodes, register new post types, connect ACF to those post types, etc. The sky is the limit! Keep reading for a little more detail on how I do that typically.
How To Add Custom Features Without A Plugin
So to explain that last child theme option a bit better, let me show you code! For the rest of this post, I’ll do something a little different and just show you exactly how I did my testimonials on my website. I’m not claiming the code is perfect, and if it breaks your website I will take no responsibility. But the following is copy-pasted from my theme files. And the screenshots are from my WordPress Dashboard. :)
Custom Testimonial Example Tutorial
Register New Post Type
Before I was able to start adding testimonials to my website, I needed to first register the post type. If you’ve worked with WordPress for some time then the following code will look familiar. All it’s doing is registering a new post type and identifying the different options inside of it. For more information on that, check out this detailed documentation on custom post types.
<?php
/* Testimonial Post Type  */

add_action( 'init', 'testimonials_post_type' );
function testimonials_post_type() {
    $labels = array(
        'name' => 'Testimonials',
        'singular_name' => 'Testimonial',
        'add_new' => 'Add New',
        'add_new_item' => 'Add New Testimonial',
        'edit_item' => 'Edit Testimonial',
        'new_item' => 'New Testimonial',
        'view_item' => 'View Testimonial',
        'search_items' => 'Search Testimonials',
        'not_found' =>  'No Testimonials found',
        'not_found_in_trash' => 'No Testimonials in the trash',
        'parent_item_colon' => '',
	);
    register_post_type( 'testimonials', array(
        'supports' => array(
            'title',
            'editor',
            'author',
            'thumbnail',
            'revisions',
        ),
        'labels' => $labels,
        'public' => true,
        'publicly_queryable' => true,
        'show_ui' => true,
        'exclude_from_search' => true,
        'query_var' => true,
        'capability_type' => 'post',
        'has_archive' => true,
        'hierarchical' => false,
        'menu_position' => 10,
		'menu_icon' => 'dashicons-editor-quote',
		'taxonomies'          => array( 'post_tag' ),
    ) );
}


?>
Install ACF and Create Fields
Now that my Custom Post Type was created, I installed ACF and added the following fields. ACF is a powerful plugin that is perfect for situations exactly like this. :) I wish they had an affiliate link because I link to them all the time!
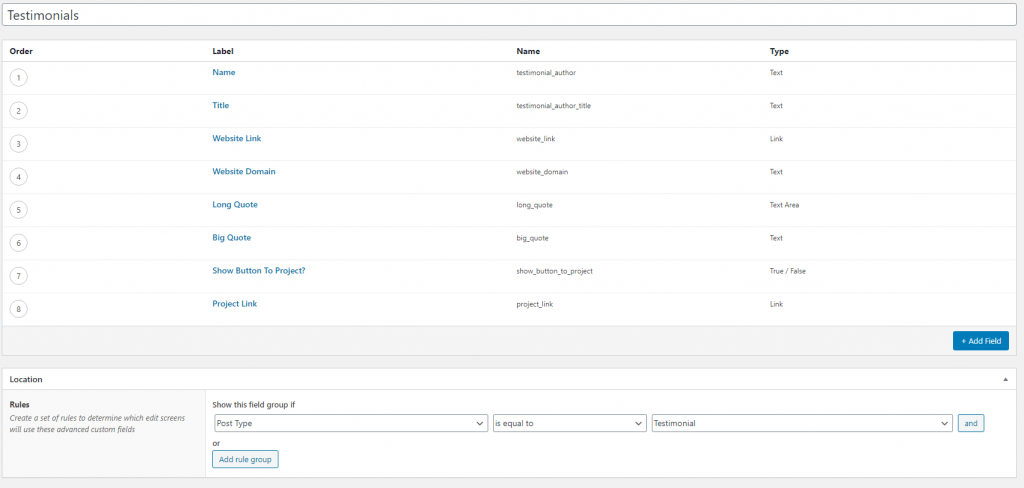
Populate Those Testimonials
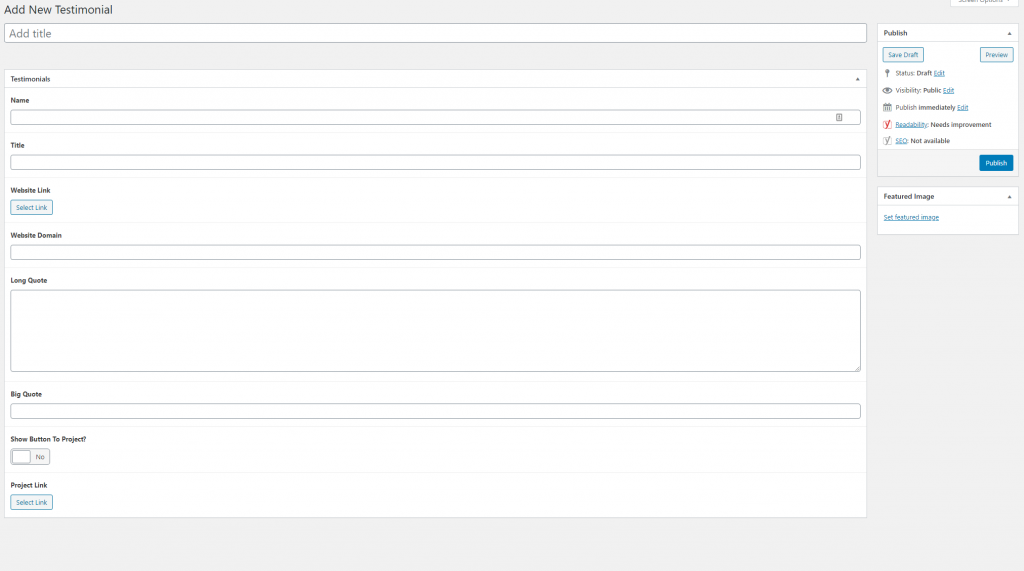
With that done, I was able to create these custom testimonials with the following options.
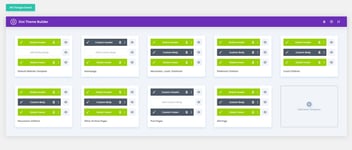
Registering the post type added the Testimonials section to my dashboard, and because of ACF, the Testimonial editor is really straightforward.

Register Shortcode
Once I had that testimonial post type created, ACF fields created, and the testimonials populated, I created a shortcode that I was able to use in modules. Below is the code that I used to do that.
<?php
// +++++++++++ testimonials_archive  ++++++++++++
function testimonials_archive($atts)
{
    ob_start();

    extract(shortcode_atts(array(
        'number' => -1,
        'tag' => '',
        'orderby' => 'ASC'
    ), $atts));
    $args = array(
        'orderby' => 'ASC',
        'post_type' => 'testimonials',
        'post_status' => 'publish',
        'posts_per_page' => $number,
        'tag' => $tag
    );


    // The Query
    $the_query = new WP_Query($args);

    // The Loop
    if ($the_query->have_posts()) {
        echo '<section id="testimonial-archive">';
        while ($the_query->have_posts()) {
            $the_query->the_post();
            echo '<article class="sing-testimonial">' . '<img src="' . get_stylesheet_directory_uri() . '/images/quote.png" alt="" width="" height="" /> ';
            echo '<div class="testimonial-big-quote">';
            echo the_field('big_quote') . '</div>' . '<div class="testimonial-long-quote">';
            echo the_field('long_quote') . '</div>';
            echo '<div class="quote-creds">';
            echo '<div class="author-text">';
            echo '<h5 class="testimonial-author">';
            echo the_field('testimonial_author') . '</h5>' . '<span class="testimonial-author-title">';
            echo the_field('testimonial_author_title') . '</span>';
            echo '<a class="testimonial-author-website" href="';
            echo the_field('website_link') . '" target="_blank">';
            echo the_field('website_domain') . "</a></div>";
            if (get_field('show_button_to_project') == 'true') {
                // Show Project Button
?>
                    <div class="project-btn-wrap">
                        <a class="project-cta-btn" href="<?php
                echo the_field('project_link');
?>">View Project</a>
                    </div>
                    <?php
            } else {
                // Do Nothing.
            }
            ;
            echo '</article>';
        }
        echo '</section>';
    } else {
        // no posts found
    }
    /* Restore original Post Data */
    wp_reset_postdata();
    return ob_get_clean();
}
add_shortcode('testimonials_archive', 'testimonials_archive');


?>
And Lastly, the CSS
And the last thing that needed to be done was to add the CSS styles. Below are the styles that I use.
<style>
/**************** Testimonials *********************/
 .testimonial-big-quote {
     font-family: 'Cardo',Georgia,"Times New Roman",serif;
     font-size: 36px;
     line-height: 1.4em;
     margin-bottom: 20px;
     color: #000;
}
 .testimonial-long-quote {
     font-family: montserrat,Helvetica,Arial,Lucida,sans-serif;
     font-size: 18px;
     line-height: 1.7;
     font-weight: 400;
     margin-bottom: 40px;
}
 h5.testimonial-author {
     font-size: 20px;
     text-align: right;
     letter-spacing: 1px;
     font-family: montserrat,Helvetica,Arial,Lucida,sans-serif;
}
 span.testimonial-author-title {
     text-transform: uppercase;
     font-size: 16px;
     letter-spacing: 1px;
     line-height: 1.8em;
     margin-bottom: 0px!important;
     display: block;
     text-align: right;
}
 a.testimonial-author-website {
     text-align: right;
     display: block;
     text-transform: uppercase;
}
 article.sing-testimonial img {
     display: inline-block;
     float: left;
     margin-right: 20px;
     margin-top: -10px;
}
 a.testimonial-author-website, span.testimonial-author-title, h5.testimonial-author, .testimonial-long-quote {
     max-width: 800px;
}
/* article.sing-testimonial:nth-child(4n + 5), article.sing-testimonial:nth-child(4n + 4), article.sing-testimonial:first-of-type {
     background: #1f6a9b;
     color: #FFF !important;
}
 article.sing-testimonial:nth-child(4n + 5) * article.sing-testimonial:nth-child(4n + 4) *, article.sing-testimonial:first-of-type * {
    color:#FFF !important;
}
 */
 figcaption {
     font-size: 12px;
}
 article.sing-testimonial {
     padding: 40px;
}
 section#testimonial-archive {
     display: grid;
     grid-template-columns: repeat(3,1fr);
     grid-gap: 0px;
     grid-auto-rows: minmax(100px,auto);
     margin-left: 0!important;
     margin-right: 0!important;
}
 .quote-creds {
     display: grid;
     grid-template-columns: repeat(2,1fr);
     grid-gap: 10px;
     grid-auto-rows: minmax(40px,auto);
     margin-left: 0!important;
     margin-right: 0!important;
     direction: rtl;
}
 .project-btn-wrap {
    position: relative;
}
 a.project-cta-btn {
     border: 2px solid;
     padding: 6px 18px;
     display: inline-block;
     position: absolute;
     bottom: 0px;
     left: 0;
}
 a.project-cta-btn:hover {
     background: #ea6739;
     border-color: #ea6739;
     color: #FFF;
}
 @media only screen and ( min-width: 1480px ) {
     article.sing-testimonial:nth-child(odd){
         background: #1f6a9b;
         color: #FFF !important;
    }
     article.sing-testimonial:nth-child(odd) * {
        color: #FFF !important;
    }
     article.sing-testimonial:nth-child(odd) img {
         filter: invert(1);
    }
}
@media only screen and ( max-width: 1479px ) and (min-width: 770px) {
     section#testimonial-archive {
        grid-template-columns: repeat(2,1fr);
    }
     article.sing-testimonial:nth-child(4n + 5) *, article.sing-testimonial:nth-child(4n + 4) * , article.sing-testimonial:first-of-type * {
        color: #FFF !important;
    }
     article.sing-testimonial:nth-child(4n + 5), article.sing-testimonial:nth-child(4n + 4), article.sing-testimonial:first-of-type {
         background: #1f6a9b;
         color: #FFF !important;
    }
     article.sing-testimonial:nth-child(4n + 5) img, article.sing-testimonial:nth-child(4n + 4) img, article.sing-testimonial:first-of-type img {
         filter: invert(1);
    }
}
@media only screen and ( max-width: 769px ) {
     section#testimonial-archive {
        grid-template-columns: repeat(1,1fr);
    }
     article.sing-testimonial:nth-child(odd){
         background: #1f6a9b;
         color: #FFF !important;
    }
     article.sing-testimonial:nth-child(odd) * {
        color: #FFF !important;
    }
}
 </style>
And that’s it!
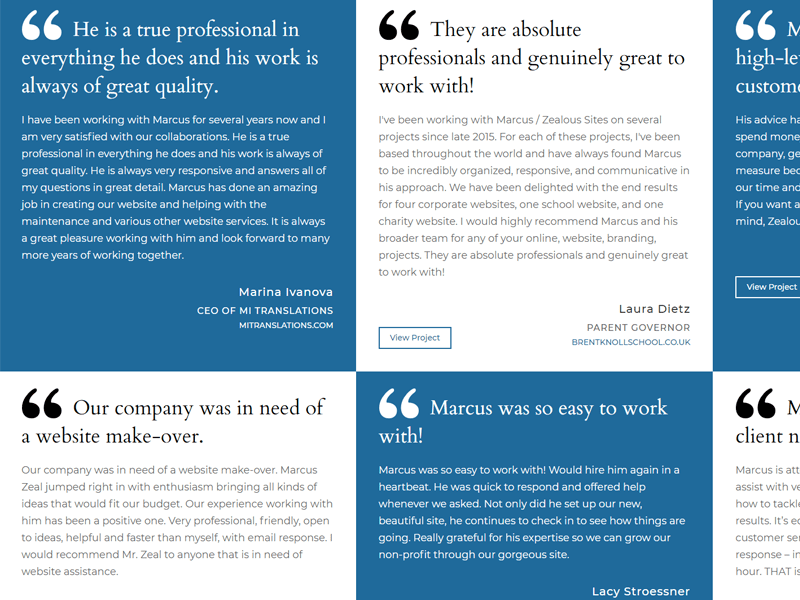
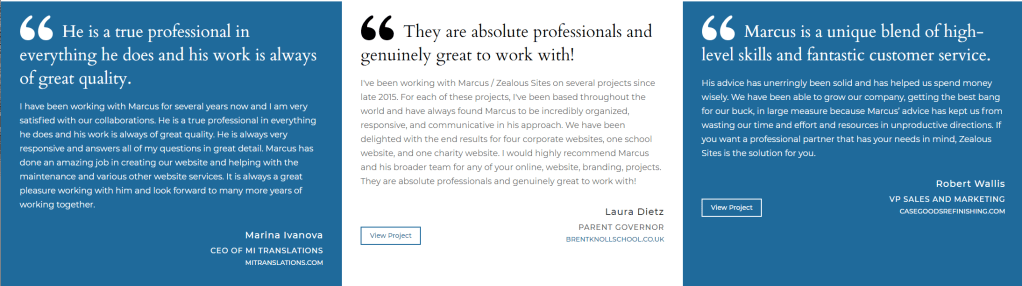
If you followed along and copy-pasted (being sure to mind those open and closing PHP tags, then you could have a pretty good looking testimonials post type too!
In Conclusion
Nearly any theme can be expanded using plugins, extensions, and child themes. What makes Divi special is that once you’ve made those expansions, you can use them in their Page Builder with ease. And we love the Divi Page Builder and I think you will too! If you click on any of the links in this post, there is a good chance that they are affiliate links. All this means is that we’ll get a small kickback if you purchase anything.
So yeah! If this post was helpful, please leave a comment below! If it wasn’t, let me know what I missed so I can make it better! And if the whole thing just seemed too difficult to do, hire me to do it for you! :)